
Requirements
The extension is a Windows desktop application that drives Altium Designer. You need all three of the following before installing.
1 · Install the extension
The extension ships as a single Windows installer. It copies the application and its pipeline, then adds the launch button to your Altium Designer toolbar.
- 1Close Altium DesignerThe installer edits your Altium toolbar configuration, so Altium must not be running. The installer will tell you if it is still open.
- 2Download and run the installerGet it from the download page while signed in. Run it and accept the Windows elevation prompt.
- 3Choose the install folderThe default is
C:\Users\Public\PCBTestFixtureGenerator, which keeps the templates and libraries reachable for every user on the machine. You can pick another folder if your IT policy requires it. - 4Let it finishThe installer registers the toolbar button in Altium and sets the application path in the pipeline script. Nothing else to configure.
- 5Reopen AltiumThe PCB Test Fixture Generator button appears in the toolbar. Click it to launch the extension.
2 · Activate your license
The first time you launch the extension it asks you to activate. Activation links this machine to your account; you only do it once per machine.
- 1Click ActivateYour default browser opens on our activation page. If the browser does not open, click the button again.
- 2Sign inSign in with the account that holds your license, the same one you use on this site.
- 3Wait for the confirmationThe page checks that your access is active, hands a signed license back to the application and shows "Activation complete". You can close the browser tab.
- 4The application opensThe license is stored encrypted on this machine, tied to your Windows account. Next launches go straight in.
3 · Generate your first fixture
Open the PCB project you want a fixture for, then click the toolbar button. The extension reads the board and shows you a summary (dimensions, number of test points, mounting holes) before anything is generated.
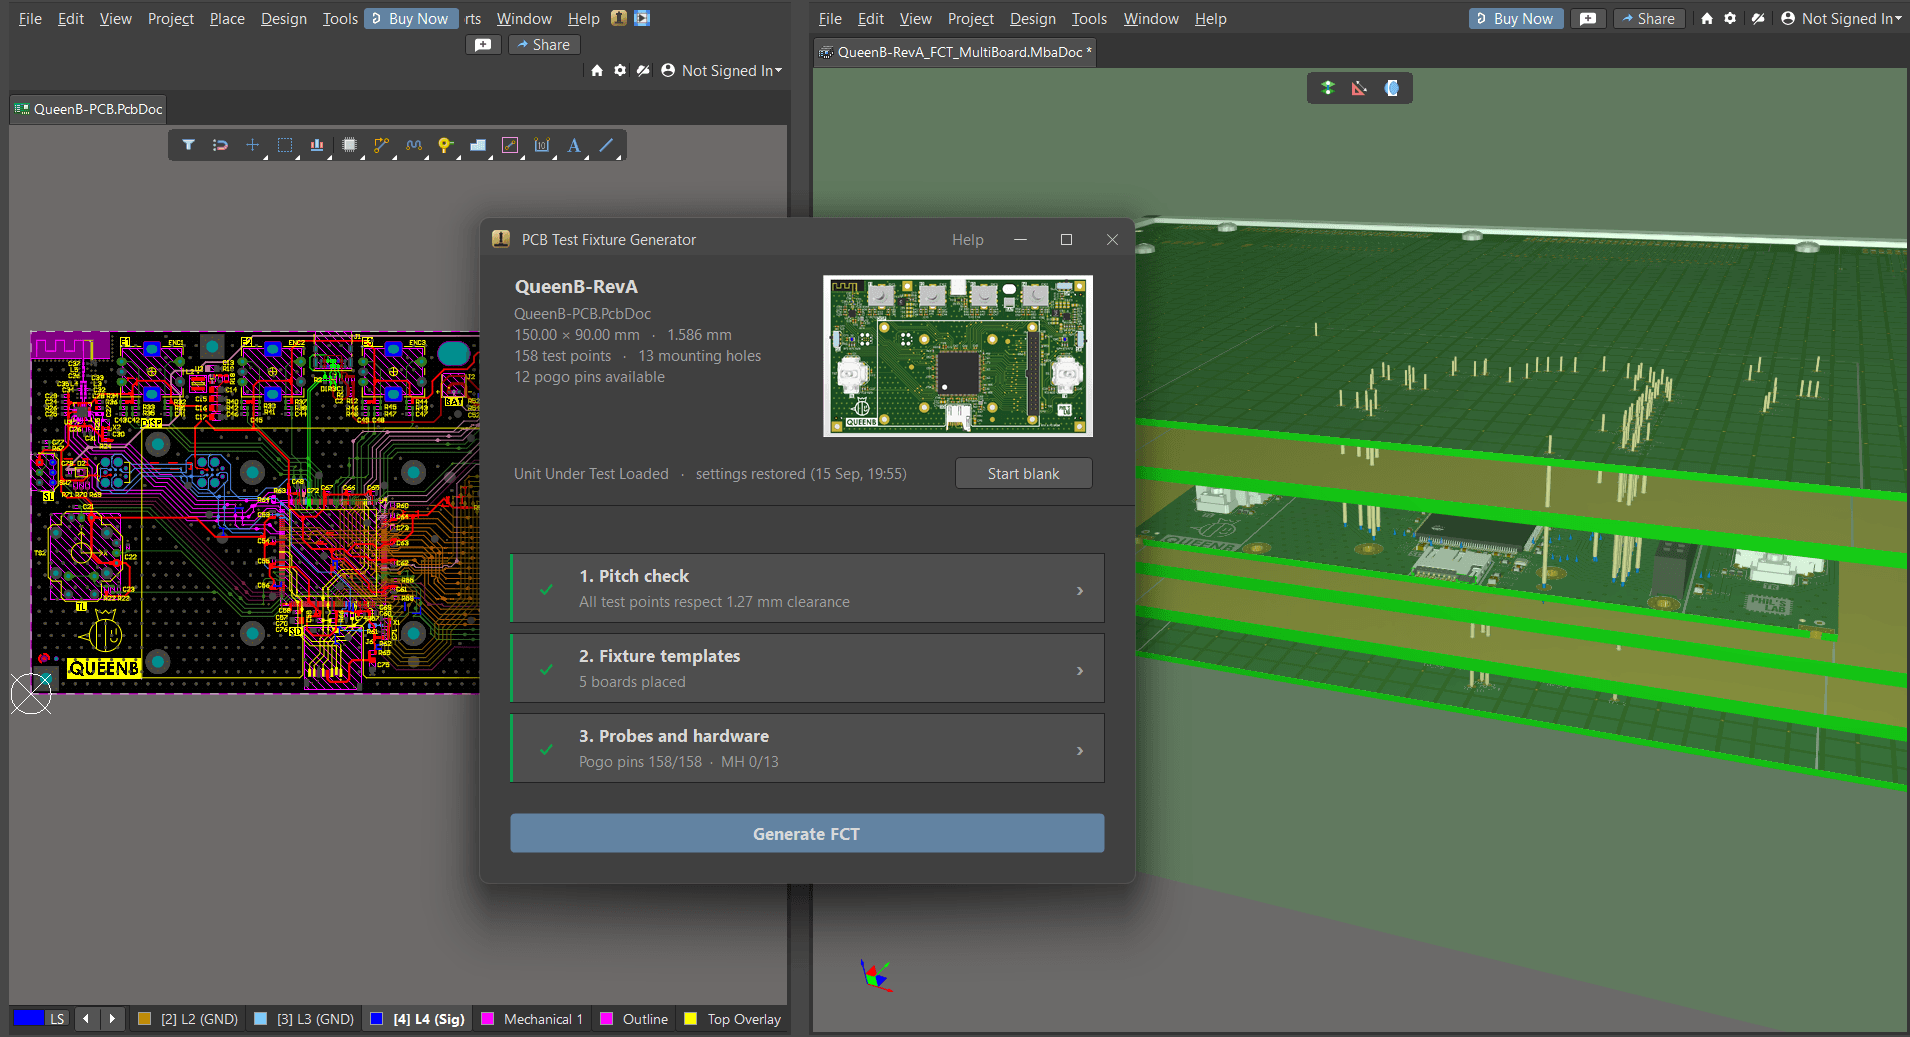
Step 1 · Pitch check
Set the minimum centre-to-centre clearance your probes require, either from the usual values offered or by typing your own, and run the check. Every test point that sits too close to a neighbour is listed and circled on the map. Fix the offending test points in your board design before you continue: this is the cheapest moment to catch them.
Step 2 · Configure the fixture
Choose the manufacturer and the series you build with, then assign a board to each level of the stack: top probe board, top guide plate, your UUT, locating plate, bottom guide plate, bottom probe board. You can adjust the level heights, and the gallery is yours to extend: add another manufacturer, another series, or the in-house fixtures your shop builds regularly, and edit them whenever your standards change.
Step 3 · Assign the pogo pins
Give every test point a probe. Filter the catalogue by head type and by the parameters that decide the choice: spring force, rated current, working and full travel, board-to-tip length, guide hole, pitch. You can narrow the list to the pins that fit the fixture you selected, import your supplier's probes and edit them from the same window, and assign one probe to many test points at once.
Generate
When the three steps show green, click Generate FCT. The extension builds the projects, the schematics, the PCBs and the multi-board assembly, then opens the result in Altium.
4 · What you get
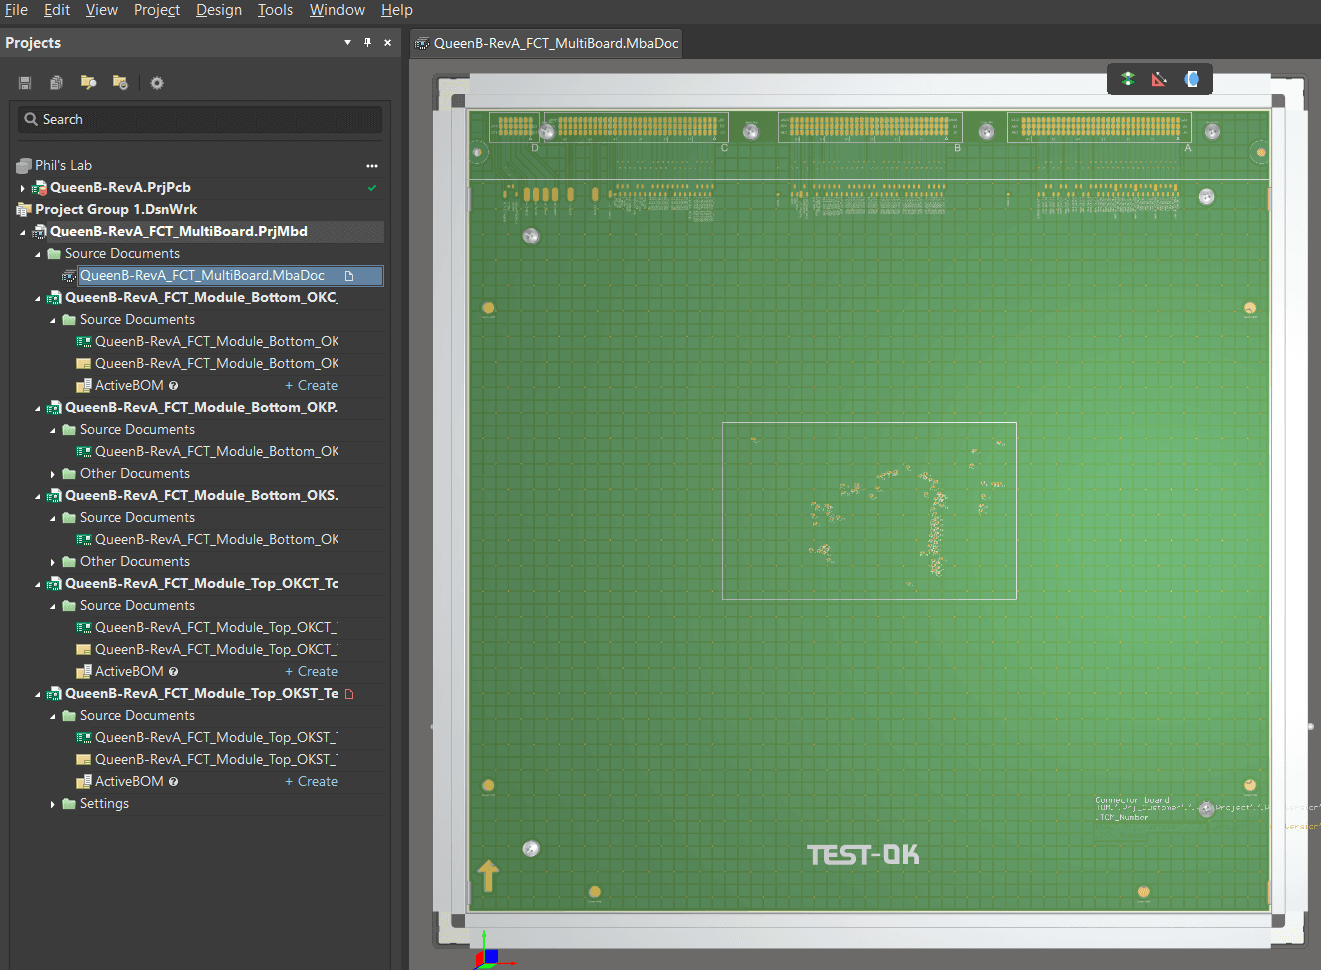
A complete Altium project group, written into a new numbered folder next to your project. Nothing you generated before is touched.
- ▪One PCB project per plate of the stack: probe boards, guide plates, locating plate.
- ▪The matching schematics, wired from your test point nets to the interface connector.
- ▪A multi-board assembly tying the whole stack together at the computed heights.
- ▪A 3D view you can inspect before anything is machined.
Managing your license
What the subscription includes
Support and every new version we release are included for as long as your subscription runs. There is no separate maintenance contract and no charge to move to a newer build: when an update is available the application offers it to you, and you keep the same license.
One active machine at a time
A license is active on one machine. Activating on a new machine transfers the license: the new machine works immediately, and the old one loses access the next time it checks in. Changing machines is something you do yourself, with no ticket needed.
Working offline
The application keeps working without a network for a while, after which it asks to check your license again. Normal travelling and site visits are covered.
Checking your status
Open Help in the application title bar. It shows your version, license status and plan, the date your access runs until, when it was last verified, and your machine ID: the details we need if you ever write to support. From there you can also open your dashboard to manage the subscription and see invoices.
Telemetry
The application reports crashes and anonymous usage counts so we can fix what breaks. Project names, file paths and board data are stripped before anything is sent. You can turn it off in the Help dialog at any time.
Updates
The application checks for a new version when it starts. When one is available it offers to open the download page; you can dismiss it and keep working. Very old versions may be required to update before they will run, so that everyone is on a build we can support.
Uninstalling
Close Altium Designer, then uninstall PCB Test Fixture Generator from Windows Settings → Apps. The uninstaller removes the application and takes the button back out of your Altium toolbar. Fixtures you generated stay where they are, since they are ordinary Altium projects and are never deleted.
Still stuck?
Send us the version and machine ID from the Help dialog along with what you were doing, and we will get back to you.